Having finished with formatting the stocksheet, it is time we improve the appearance of the Documentation Sheet. Remember it is the first sheet that an user comes across and should be attractive enough to grab and retain the attention of the reader.
Click on Documentation Sheet to look at the current status of the documentation sheet.
The following are the suggestions for improvement of the documentation sheet:
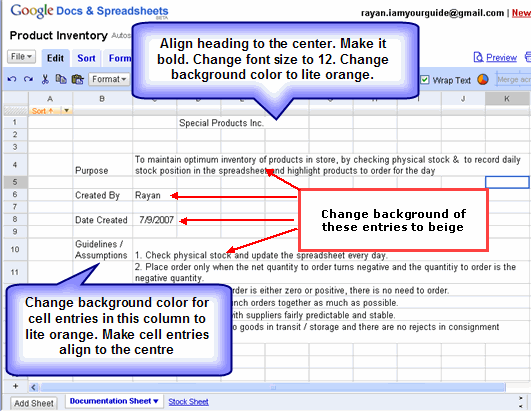
1. Align heading to the center. Make it bold. Change font size to 12. Change background color to lite orange.
Click on cell D1 to select cells D1 through F1. Click on Align button on the tool bar and select center alignment out of many options that drop down. This makes the heading to be center aligned in cells D1 through F1. If in doubt refer to Step 1 followed in the earlier part of the lesson titled Format the worksheet I for center alignment.
Click on Font size button on the toolbar and choose size 12 in the drop down list. If in doubt refer to Step 1 followed in the earlier part of the lesson titled Format the worksheet II for changing font size.
Now click on Bold button on the tool bar to bold face the heading. If in doubt refer to Step 5 followed in the earlier part of the lesson titled Format the worksheet I for bold facing.
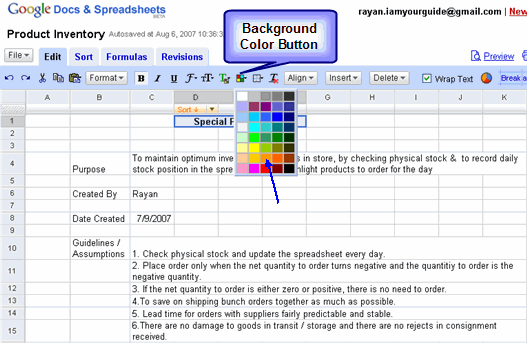
Click on Background Color button on the tool bar to drop down a list of available colors. Select lite orange color as pointed by the blue arrow shown below:
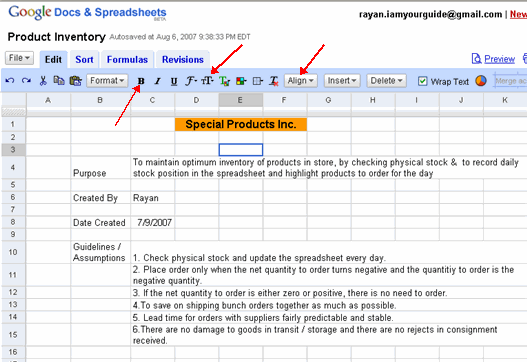
With those changes made the documentation sheet looks as shown below ( The buttons used for this step are marked with arrows):
2. Change background color for cell entries in this column to lite orange. Make cell entries align to the centre.
Click on cell B4 and click on Background Color button on the tool bar to drop down a list of available colors. Select lite orange color as pointed by the blue arrow. If in doubt see Step 1 above.
Now click on Align button and choose center alignment for this caption in cell B4.
Click on Bold button to make this cell entry bold.
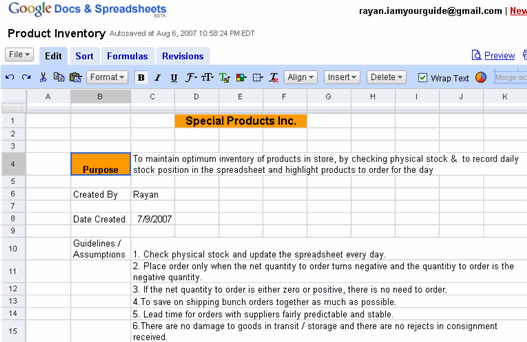
With these changes made, the Documentation Sheet looks as follows.
Repeat the procedure outlined in Step 2 above, for cell entries B6, B8 & B10.
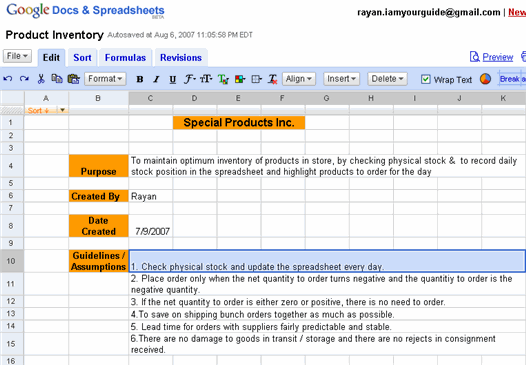
3. Change background color in cell entries beginning in column C.
Click on cell C4 and click on Background Color button to get the drop down list of available colors. Out of these choose Beige color as pointed by the blue arrow.
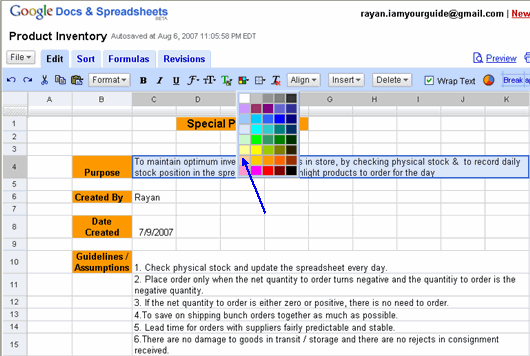
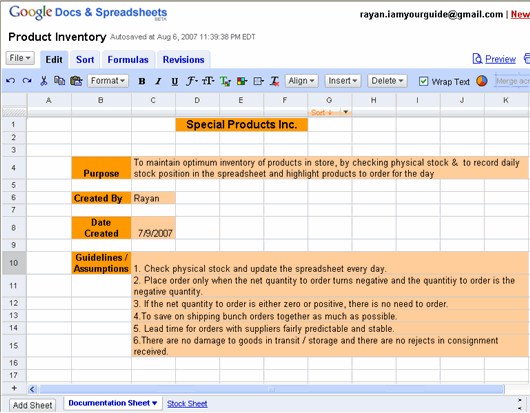
Repeat the procedure outlined in Step 3 to apply Beige background to cell entries C6, C8, C10 through C15. When selecting cells C10 through C15, click on cell C10 first and hold the Shift key and then click cell C15. This selects all cells C10 through C15.
The formatted Documentation Sheet looks as shown below:
This completes this part of the lesson on creating a professional looking workbook. Of course one is not limited by the ideas presented in this lesson for formatting the cell entries. With the available tools and options available in Google Spreadsheets, one can use one’s imagination to make it even more presentable.
<--BackTo: Format the Worksheet II
Next: Publishing a worksheet to the world as a web page –>